System
This documentation is for users and administrators, not those wanting to install.
Apple’s iOS operating system works very well with Federated Core. Here are the simple steps to connect you mail, calendar, and contacts applications on iOS to Federated Core.
Configuring Mail
Navigate through the “Settings” app and select “Mail > Accounts > Add Account”. You will be brought to the following screen. Click on “Other”.
Rant: who uses Aol today?
You then choose the type of account you want to add. Click “Add Mail Account”.
That will bring up a series of dialogs. Here are the credentials you will need for these dialogs.
- Name: however you want to be identified
- Email: your Federated Core email address
- Password: your Federated Core password
- Description: however you want to label this account
When you click “Next” it will fail. You’ll need to enter your Mail server on Federated Core details manually. You want to choose “IMAP”.
- Host Name: https://mail.domain.com (where “domain.com” is your domain name)
- User Name: your Federated Core email address
- Password: your Federated Core password
These values are the same for both “Outgoing” and “Incoming” mail servers.
Configure your servers…
Configuring Calendar
Navigate through the “Settings” app and select “Calendar > Accounts > Add Account”. You will be brought to the following screen. Click on “Other”.
You will want to select “Add CalDav Account” after choosing “Other”.
Here are the credentials you will need:
- Server: (see below for instructions to get this value)
- User Name: you Federated Core email address
- Password: your Federated Core password
- Description: however you want to label this calendar
Calendar Server Address
Getting your calendar server is specific to the calendar you want to subscribe to and can be found as follows.
We get the calendar server address from the Calendar application in Nextcloud. You click on the “pencil” icon and then get the following dialog…
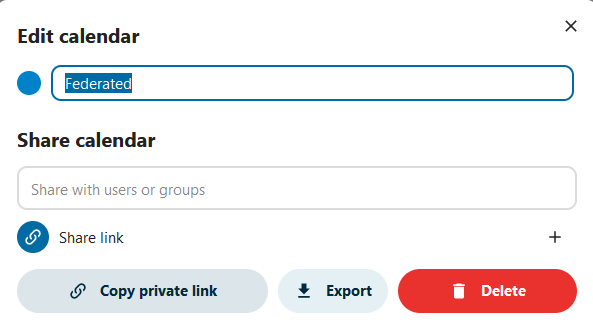
Click on “Copy private link” and use that in the “Server” field above.
Configuring Contacts
avigate through the “Settings” app and select “Calendar > Accounts > Add Account”. You will be brought to the following screen. Click on “Other”.
You will want to select “Add CalDav Account” after choosing “Other”.
Here are the credentials you will need:
- Server: (see below for instructions to get this value)
- User Name: you Federated Core email address
- Password: your Federated Core password
- Description: however you want to label this contacts server
Contacts Server Address
Getting your calecontactsndar server is specific to the contacts group you want to subscribe to and can be found as follows.
We get the contacts server address from the contacts application in Nextcloud. You click on the “Contacts Settings” icon and then get the following dialog…
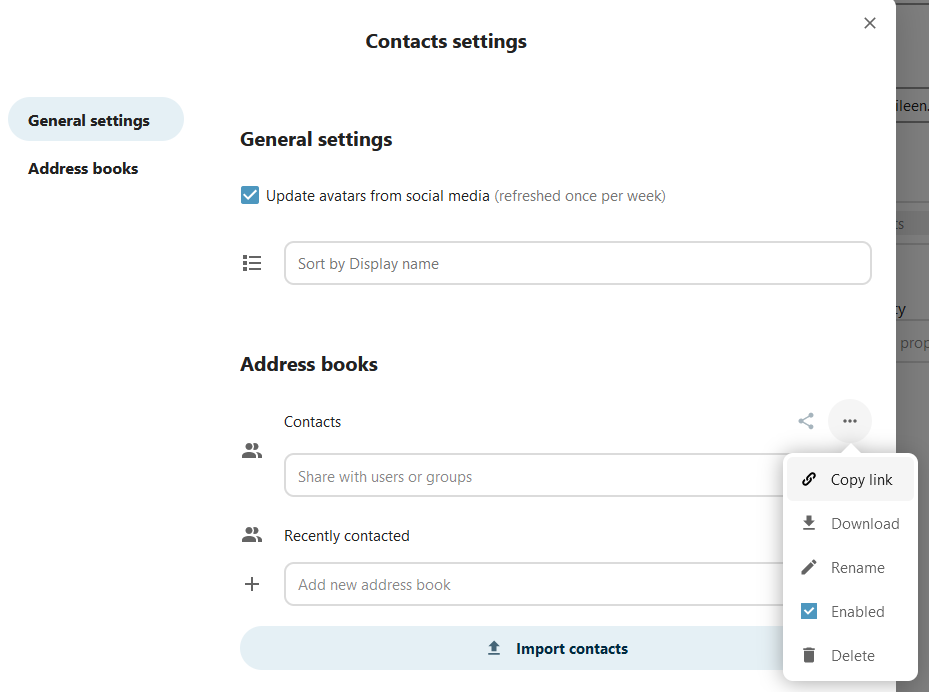
Click on three dots next to “Contacts”, click on “Copy lin” and use that in the “Server” field above.